
I have been promising myself for ages to do this Bias binding tutorial. My good friend Adair had been shown this ingenious method by her sister and I was lucky enough to be shown by Adair...so now it's my turn to pass it on.That's what I truely love about crafting.....if you know a little trick or a tip....isn't it just fantastic to let others know too.
 I cut a rectangle 12inches by 21inches.
  Fold back a piece and cut on the 45 degree line.
  Cut at 45 degrees
 Pin the Straight end of the triangle to the opposite side.Run down through the next pictures if this sounds confusing.Its simple...you'll see!!
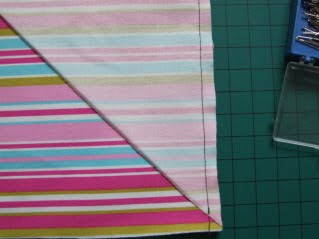 Sew!
Sew! And press open.
 Now then....Pin the long ends together,keeping the end of one side 1.5inches down from the other end.(I want 1.5inch wide binding)
 Sew and press open and this is what you should have.
 Cut around and around....and around the tube...I cut by eye but you can mark if you like.
 From my rectangle I got 4 yard of binding....Brilliant isn't it....

 Turn and stitch a double hem on the 2 25inch long sides of the sash piece


 This is the fun piece.........Gather up the sash to the centre.
 Pin through the folds and trim the excess fabric.


